










Há 2 dias
Sometime this week, Google Reader will retire its many confusing sharing features, in attempt to force their small but passionate community to relocate to Google+. It's part of the company's portal-wide redesign effort that will soon affect Blogger and Gmail, where Google will be adding new features instead of taking them away. But if you're a devoted Google Reader user, however, the chore of figuring out how to recreate your old Reader experience in the absence of friending and following far outweighs the upgrades like fancy new button gradients and Google+ integration. Don't worry. We've got you covered.
We borrowed the term "Reader-specific circles" from Google's executioner-like blog post about the outgoing social features: friending, following and sharing. This is the full-conversion solution that Google hopes most Reader users decide to pursue. If you're familiar with Google+, setting up the Circles is dead simple, but finding those friends and adding them to the circle one at a time is huge pain. (Unless, as hinted in the official blog post, Google launches an easier export feature with the redesign.) Google+ also won't perfectly re-create the Reader sharing experience. And if you had any doubts about how badly Reader needed a redesign, the number of total steps and illustrations needed to sort everything out will dash them.
If you share items publicly in Reader, you don't have to change a thing - All of your Reader shares should be viewable by everyone following you. You just have to tell them to add you to their Circles in Google+.
Create a specific circles for your Reader friends
Move all of your Reader followers and follows into Circles
If you're feeling burned by Google and want to ditch it altogether, there are a couple other RSS readers on the web that we'd recommend. However, social RSS readers have been hit hard by the successes of sharing on Facebook and Twitter so the once crowded marketplace that included start-ups like Streamy and Feed Each Other is now pretty barren. Tumblr also used to support RSS, but they axed the feature this summer. We'll be the first to say that the Reader alternatives are not great, and it might be time to admit it: RSS is dead.
Netvibes - Once a Google Reader competitor, Netvibes is a decent RSS reader with very basic sharing options: email, Facebook and Twitter. There's some bonus functionality in being able to set up Netvibes as an iGoogle-like homepage, if you're into that kind of thing. Bloglines is a very similar service.
BuzzBlaze - Earlier this year, The Next Web posted a preview of BuzzBlaze, an application that looks like a next-generation Reader. However, for now it's in private beta, but you can sign up for early access.
Google+ - As much as it hurts to admit it, Google+ is probably as close as you're going to get. Five months after launch, the social network is facing flagging traffic, struggling to keep people on the site and not making much progress with power users, like celebrities (as Twitter did) and brands (as did Facebook). But Google+ isn't finished yet. In the past few days, a small wave of new features have been splashing around in other Google products, like Reader and Blogger, and Google executives have announced that they'll soon allow pseudonyms on the site. It might even get a music store!

Click to enlarge graphic:
Source:
Google and Your Memory
Online Colleges
September 19, 2011

My operating system of choice for this article will be Fedora Linux, as Linux in general is known for getting servers up and running quickly, and easily. In addition, Fedora is well supported by both a community and a corporation, has great security, and offers graphical configuration tools for multiple servers.
If you don’t have Fedora installed on your system yet, you can do so with the DVD because you can also choose to install Apache at the same time. If you take this route, while installing from the DVD you’ll be able to choose which packages you want to install with the “Customize Now” switch. Choose it and then under the Servers tab, you can select “Web Server”. Go ahead with the installation until you can boot into your new system. From there, you can install the graphical configuration tool by choosing the package system-config-httpd from your package manager, or run sudo yum install system-config-http.
If you already have Fedora installed, you can install both the web server and the graphical configuration tool. You can install the httpd and system-config-httpd packages from the package manager, or run sudo yum install httpd system-config-httpd.
You can now start the graphical configuration tool from System Tools –> HTTP. The first tab you’ll see is the Main tab, where you can configure the server name, administrator email address, and under which addresses the server is available under. I recommend that you add an address right now, and choose “All available addresses” on port 80 for simplicity.
The second tab contains the different virtual hosts, or the number of different websites on the same server, that are configured. The server can differentiate what domain name was entered into the browser and therefore choose the correct virtual host when displaying a page.
There are plenty of different settings that you can choose for each virtual host, including the necessary components as well as hard-to-configure ones such as SSL (HTTPS). For a majority of items, the graphical configuration tool should be able to take care of your needs.
The final tab has everything to do with performance and the amount of connections that are allowed. There are no recommended settings as each server has different capabilities, so if you have a larger website you’ll need to play around with these numbers and see what works (provided that you have enough traffic to test out the settings correctly).
Before you can actually access your new web server, you’ll need to open your terminal and then run sudo service httpd start to actually start Apache and sudo chkconfig httpd on to make Apache start at every boot.
Step 3 in our process is simply to test out whether you can access your page or not. On the same machine, open up Firefox and type in localhost or 127.0.0.1 to see if you get this test page (provided that you didn’t change the document root):
If not, you may have done something wrong in your configuration or not started Apache yet.
It’s pretty cool to have Apache up and running on your very system, considering that it’s the same technology being used by most of the websites you visit every single day (including MakeUseOf). If you want other machines to have access, you’ll need to go into Fedora’s firewall configuration utility (installed by default) and make sure that HTTP (Port 80) is open. Also, if you want to run more complicated web frameworks such as forums or WordPress, you’ll have to install MySQL and PHP as well, but I’ll leave that for another article.
How easy do you think this process is? What do you like or not like about Apache? Let us know in the comments!
How To Set Up An Apache Web Server In 3 Easy Steps is a post from: MakeUseOf


I’ve had the Phottix Odin Wireless TTL Triggers for less than a week now, but they’ve quickly turned into something that I need to have in my camera bag with me at almost all times. Recently, they saw lots of action during my visit to New York City Comic Con 2011. So how have they held up so far? And are they better than the Canon wireless flash system?
Details taken from Phottix’s website.
Other specs
Frequency: 2.4 GHz
Distance: 100m+
Channels: 4 channels
Groups: 3 groups – A, B, C
Batteries: 2 x AA batteries (TCU and Receiver), 5V DC on receiver (external power port)
Max sync speed: 1/8000 sec*
Output: Hot shoe, 3.5 mm port (receiver)
Input: USB port (transmitter and receiver)
Attachment: 1/4 tripod lug, cold shoe (Receiver)
Input voltage:2.4-3.2V
Flash port voltage handling: 6V (transmitter) ≤300V(receiver)
Body dimensions: 94(L) x 66(W) x 35(H) mm, (transmitter), 90(L) x 45(W) x 40(H) mm (receiver)
Weight: 105g (transmitter), 66g (receiver) – without batteries
Operating temperature: -15—65 C
Storage temperature: -30—85 C
Compatible: Canon EOS Digital Cameras and Flashes. Some third party TTL flashes may function with the Phottix Odin. Due to the vast number of third party alternative Phottix will not test, support or troubleshoot third party flashes.
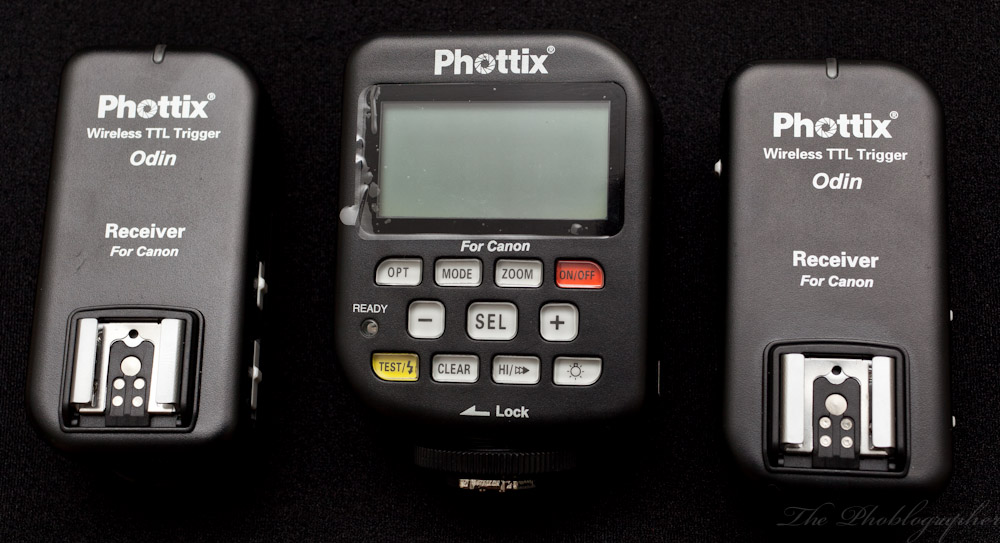
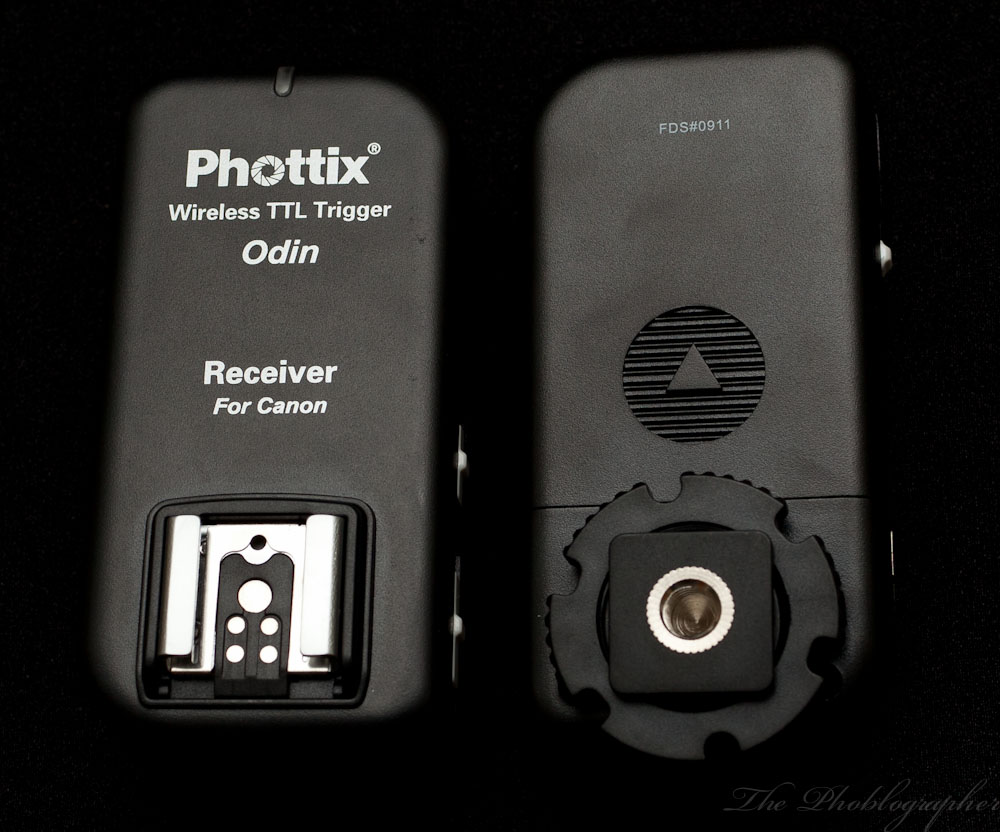
The Photix Odins will be familiar with most users that have used radio receivers already. The design and layout of the triggers is extremely straight forward. That can’t totally be said about the transmitter; more on that later.
The transmitter features many buttons: an option button, mode button, zoom, on/off, down/-, select, up/+, a test button, clear, high speed flash synch, and an illumination light for the screen.
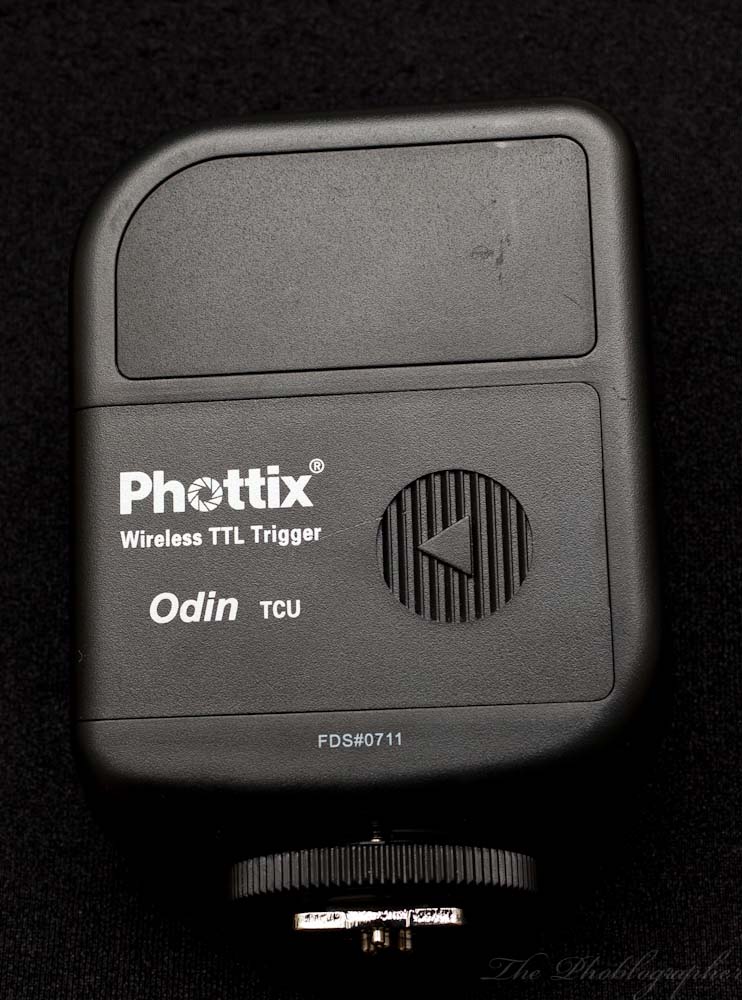
The back of the transmitter is also straight forward, featuring the battery compartment. In the hand, the triggers don’t feel as solid as some other options I’ve played with such as PocketWizard Mini and Flex or the Impact PowerSyncs. Indeed, they feel a bit hollow. When I apply pressure on them, I feel as if there is nothing behind the plastic casing pushing back at me. With the other two competitors I mentioned, I feel as if I’m trying to squeeze a rock.
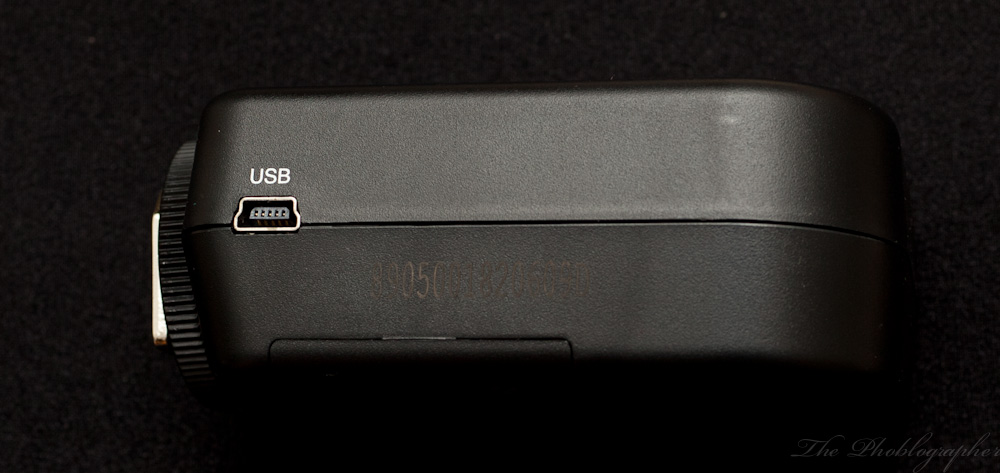
The transmitter also features a USB port for things such as firmware updates. You also get a small piece of software with the device. Admittedly, I haven’t even read the manual yet and have instead just tried to explore, so I’m not sure what the software does at the moment. This is how I figure out how intuitive the whole system is though.
The receivers have switches on both sides. On one side, the user can control the channels for your particular flash while on the other side the user has control over what group the flash is in.
Additionally, you have your standard on/off switch, USB port, and DC input.
The tops of the receivers is very standard looking: it’s just a hot shoe to hold your flash. Meanwhile, the bottom features a locking mechanism if you’d like you attach it to something. Plus there is a tripod socket and your battery compartment.
During the testing phase so far, I tested the Phottix Odins are New York City Comic Con 2011 with my Canon 580 EX II, 430 EX II, Rogue Flash Benders, and Hacked Beauty Dish.
Booting up the Odins are simple: the switch is flicked into place for the receivers and the transmitter just requires you to hold the on button for a while. Though I didn’t like holding down a button, it’s a good security feature. For example, if the button gets pressed in your pocket or camera bag, it could turn the transmitter on and then burn the battery life. But it won’t happen since it needs to be held down. I wish I could say the same for the receivers, however those were only turned on by accident only once in the period of a week.
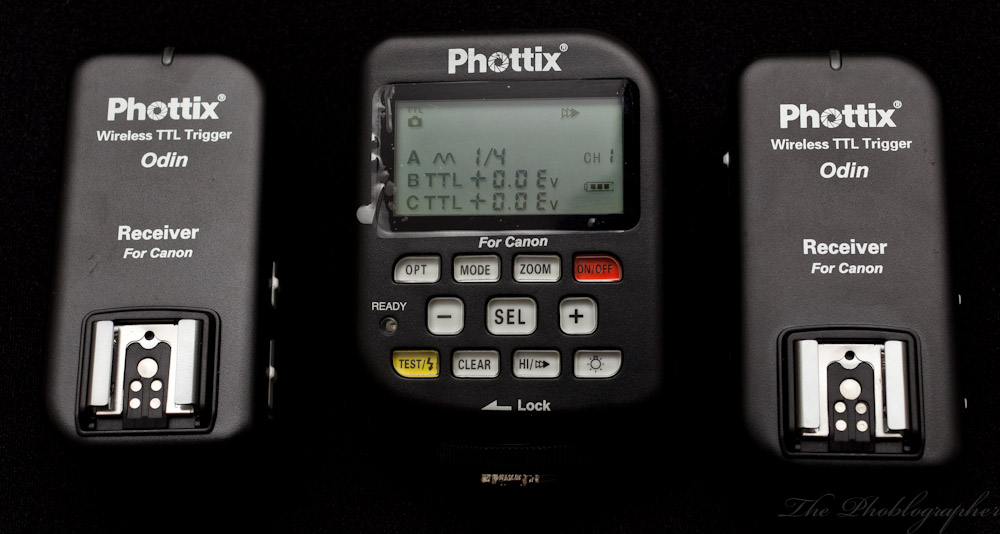
Scrolling through the options on the transmitter is a bit odd. To cycle through the groups, you press select and then make your according adjustments. Once you’re done with A (as I set it to 1/4 power output in the above photo) the transmitter will go to B and then C and then other options.
By pressing the Mode button, you can control your ratios.
Pressing the Test button and also firing the flashes made me realize that after the transmitter has sent a signal to fire a flash, it requires a recycle time of around 1.5 secs for it to be able to fire the flash again. Indeed, this threw myself and my lighting assistant off when we were at Comic Con. In fact, we sometimes even thought the system was malfunctioning. However, we just came to accept the results and carefully watched the back of the transmitter. On the bottom left hand side, you’ll see a ready light appear when the transmitter is ready to sent a signal.
Over a period of around four hours the first day and seven hours the second day, the transmitter and receiver both stayed perfectly functional and the batteries were still working. I was using the non-rechargeable Energizers that came with the package; which leads me to believe that the Odins consume very little power.
So how does the TTL metering work? Phenomenally. In fact, using these triggers is just like using the Canon wireless flash system but without the need for a pre-flash going off. To be clear, Canon’s system (at the time of publishing this article) uses infrared signals, which means that a pre-flash needs to go off in order for the flashes to be triggered.
Essentially, this has rendered my 7D’s wireless flash capability useless; and my 7D only comes with me to gigs when I need extra reach from my lenses due to the APS-C sized sensor. Instead, I opt for my Canon 5D Mk II.
Though I made bad remarks about the build quality of the Odins, I should mention that it was hit many a time by fan boy after fan boy (by accident) while Matt (my lighting tech) and I perused the showroom floor of the Javitz Center. They Odins stood up to all of that wear and tear plus the torture of being in my Think Tank Retrospective 30 while being in a packed subway car and having the bag bumped.
It’s too early for me to give my full judgement on the Odins, but at the moment, they’re impressing me.
Here are some photos I shot using the Odins and my Beauty Dish Hack.
The Odins allowed me to focus more on positioning my lighting and composing my subject; which put my mind at ease instead of trying to make sure that an infrared receiver would see a pre-flash (as is standard with the Canon Wireless Flash system).
We love to bring you guys the latest and greatest news and gear related stuff. However, we can’t keep doing that unless we have your continued support. If you would like to purchase any of the items mentioned, please do so by clicking our links first and then purchasing the items as we then get a small portion of the sale to help run the website.
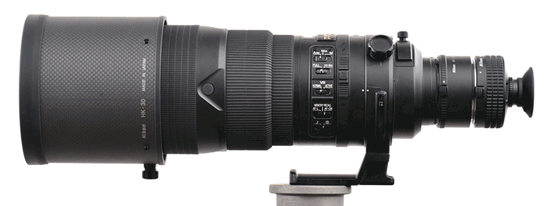
Today’s guest post is from Fabrizio Belardetti (www.fabriziobelardetti.com) who also reviewed the rare Nikkor 19mm f/2.8 Macro lens last year. He will explain how to turn your Nikon G lens into a telescope (or a microscope) with the help of an old Nikon lens scope converter:
The Nikon lens scope converter is an unusual item (check those eBay listings), quite rare and really well built. Nikon lens scope converter is from the AF D era when Nikon lenses had their mechanical aperture rings.
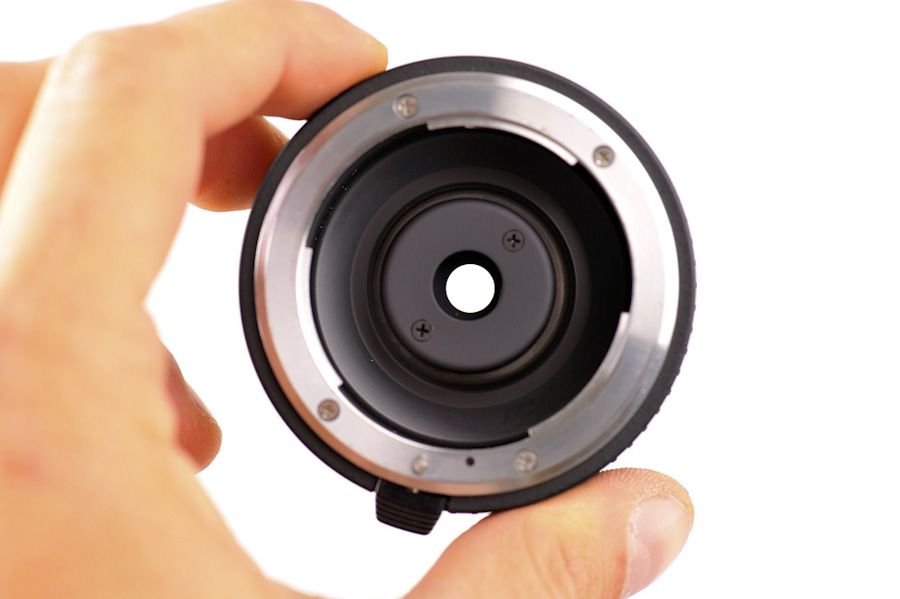
Here’s a view of the inside of Nikon scope converter – as you can see there’s no coupling mechanism for the diaphragm, it just contains a prism and a 10mm focal length eyepiece. If you want to use the Nikon lens scope converter with G lenses, you have to modified it a little in order to get the aperture blades fully open.
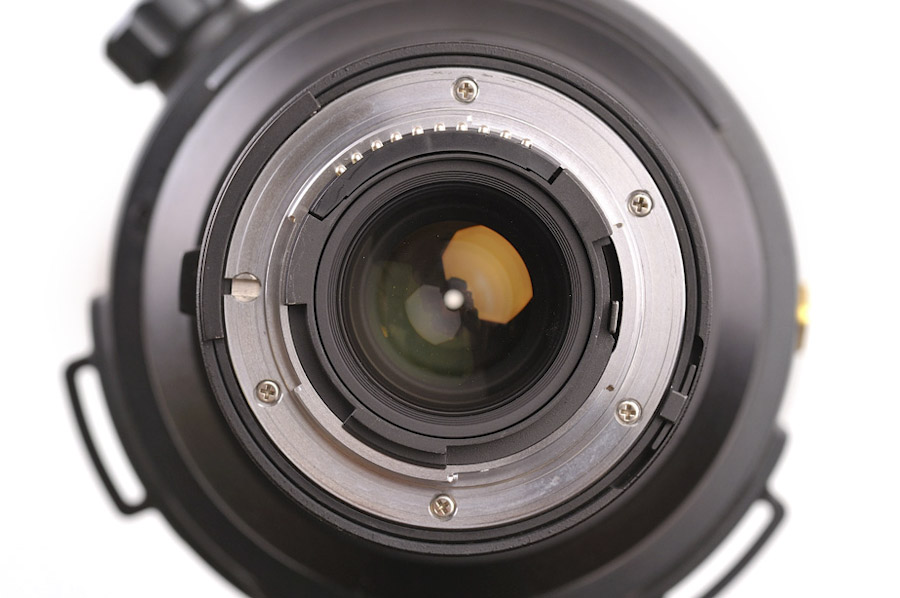
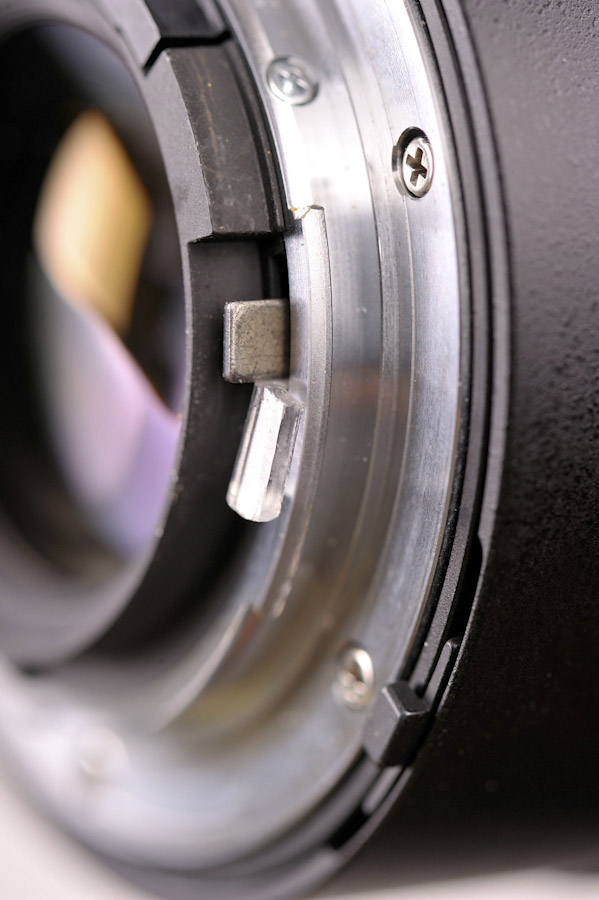
When the lens is not attached to a camera body, the aperture blades inside the lens are fully closed:
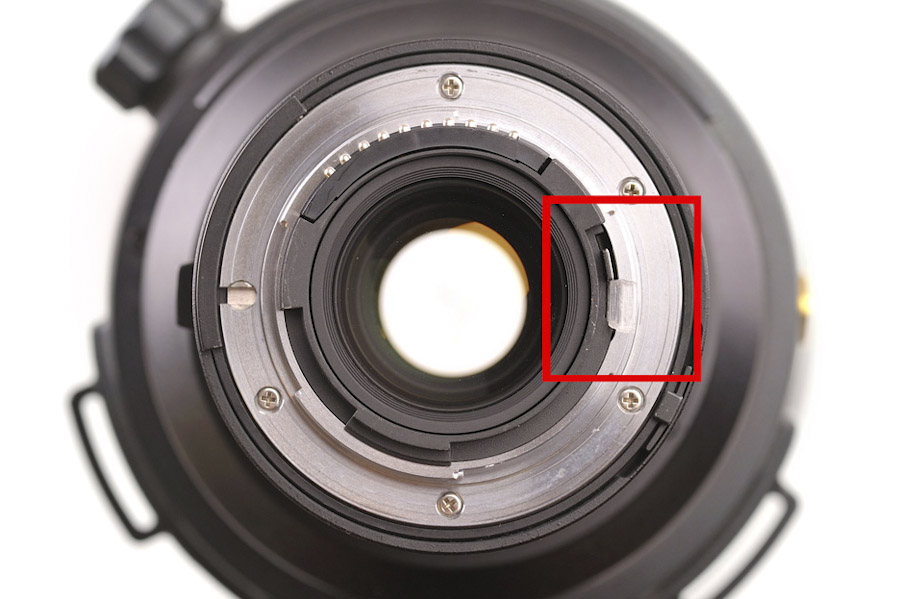
Aperture blades are controlled by a lever connected to a spring which holds the diaphragm closed. There is no lever in the Nikon lens scope converter that would operate this lens lever when you attach it to the lens. To get the aperture blades fully open, you just need to build a small piece of plastic to fill the gap and keep the lever up – as a result the diaphragm will stay open. The work needs to be very precise, so I carefully worked with a knife a piece of plastic. It took several tries, but at the end it just worked. Since there’s no coupling, there’s no risk of damaging anything inside.
It’s important that the plastic piece stays shorter than the mount edge so you can lock the scope converter easily:
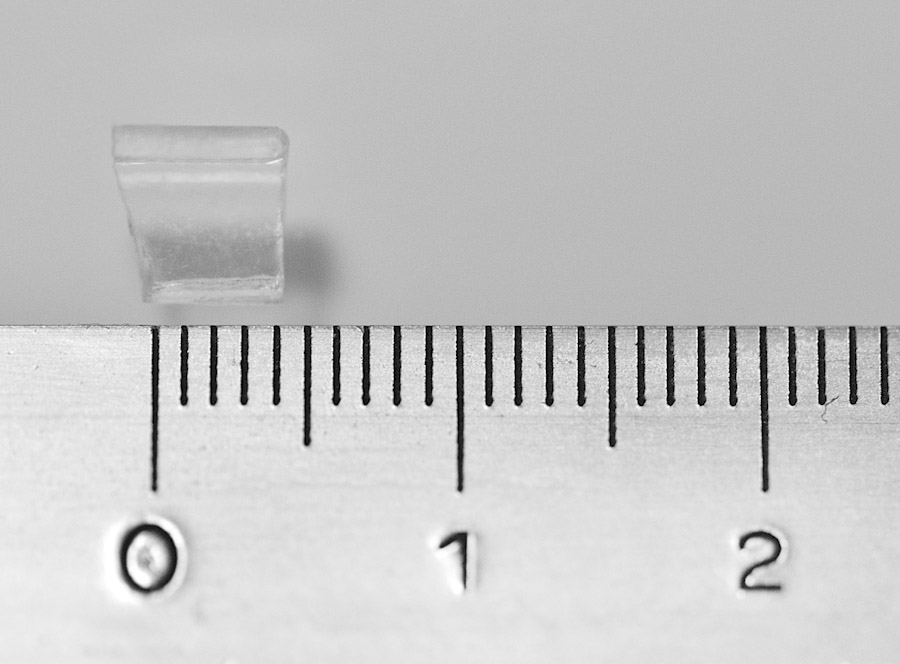
For my lens, the plastic piece was about 4mm in length:
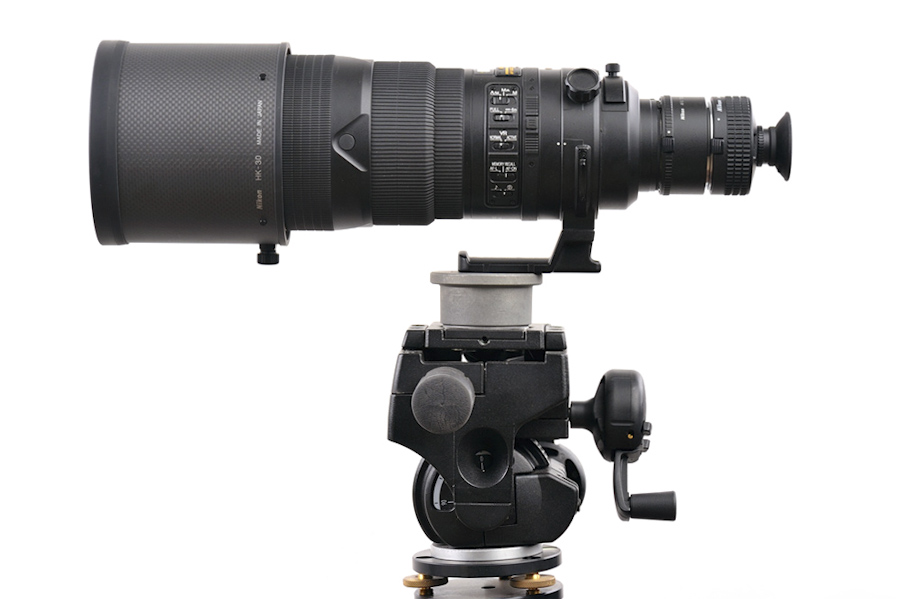
The power of the telescope is calculated by the focal length of your lens divided by 10, in my case a 51x telescope. I can assure the image quality is simply amazing! This is because the converter doesn’t use the entire image area, just a small portion in the center, which of course is the sweet spot for any lens.
If you mount the Nikon lens scope converter on a Micro lens, it will give you 25X the magnification of the lens that is attached to. I’ve use it on my AF-S 105mm 2.8D Micro and I end up with a 25X handheld microscope.
VR won’t work without a camera body, so you need a sturdy head and tripod to minimize any wobbling when you use this setup.
With this “telescope” you can see things that your eyes can’t just imagine and everything is sharp and detailed. A couple of days ago there was a full moon with a clear sky and spent some time looking at the moon and stars… I truly got lost in the sky! Everything appears like…in 3D. Really amazing!
You cannot take any pictures with this setup, you can only look inside and say WOW!
Posted by NikonRumors.com
This RSS feed is copyrighted and cannot be republished in any way without permission.
Follow [NR] on Facebook and Twitter.
Related posts:


