Whether you are a seasoned veteran or are new to Photoshop, you are bound to come across swatches at some point. Swatches allow you to save and select colors so that you can quickly use them again in your workflow. In today’s tutorial, we will demonstrate how to use swatches quickly and effectively in Photoshop. Let’s get started!
Step 1
Before we get started, make sure your swatches panel is open. First, change your workspace to "Design". Do this by looking in the top toolbar, then choosing Window > Workspace > Design.
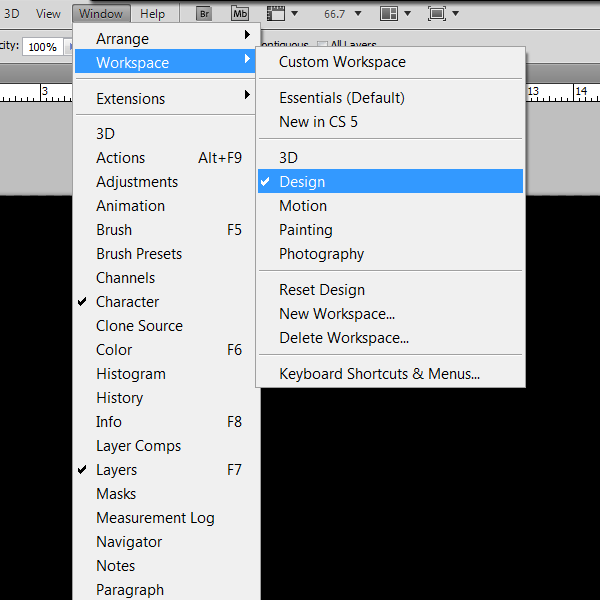
If your worskpace doesn’t look like the example below, you may want to reset your workspace by choosing Window > Workspace > Reset Design. This will reset all the panels in the workspace. You can also enable the swatches window by going Window > Swatches.
Next, let’s reset your swatches to minimize any extra swatches you may have. Do this by navigating to your swatches panel, then clicking the dropdown menu icon in the top right hand corner of the panel, then choosing "Reset Swatches".
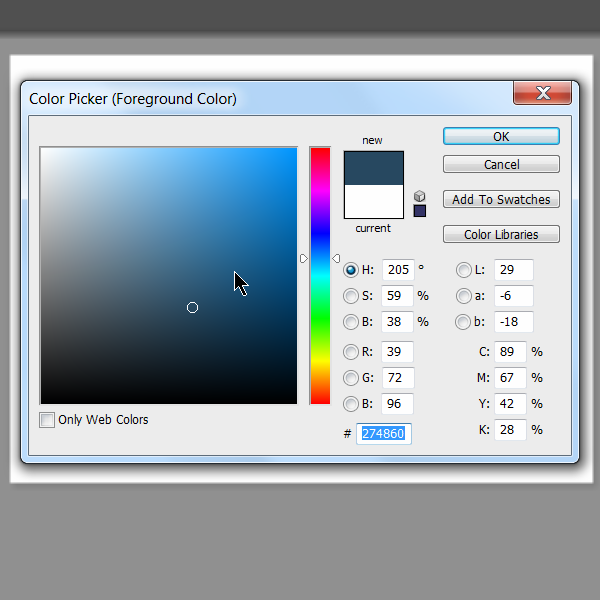
Step 2
Open up your color picker panel/window. If you have a color, pick it. If not, you can use the color I chose, which is #274860
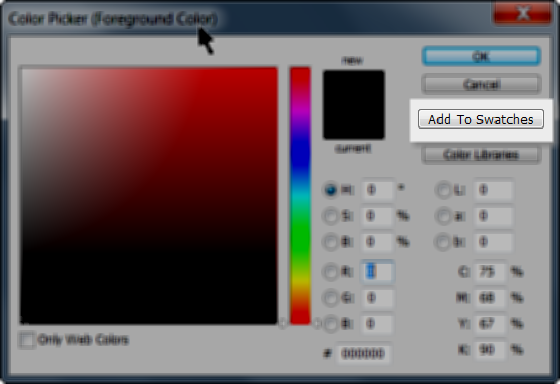
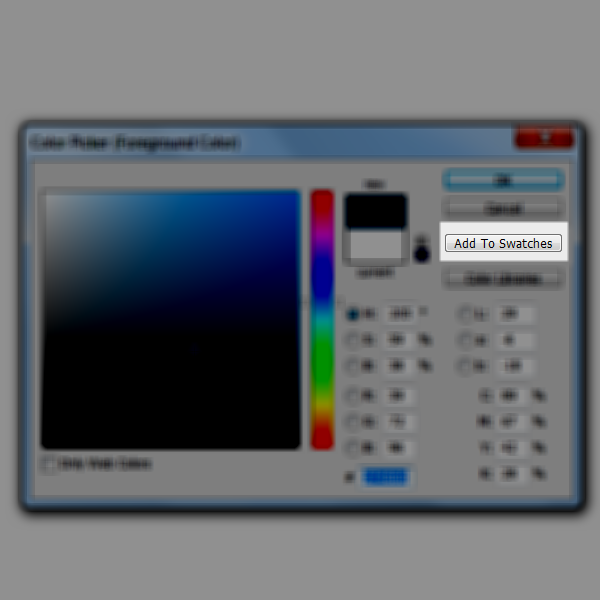
Step 3
Before you close the window, we are going to click the “Add to Swatches” button inside the window.
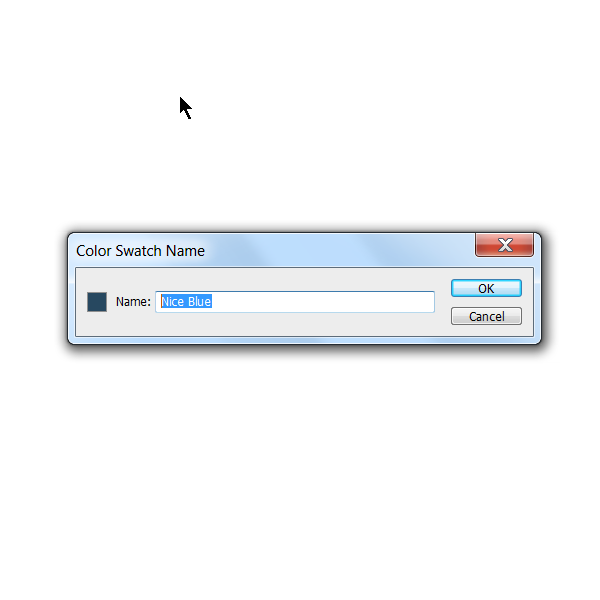
Step 4
After you click the “Add To Swatches” button, the following window should appear. Enter your desired name for your swatch. In this example, I will enter "Nice Blue". Doing this will save that color into your swatches. So now you may ask, how do I access the swatch?
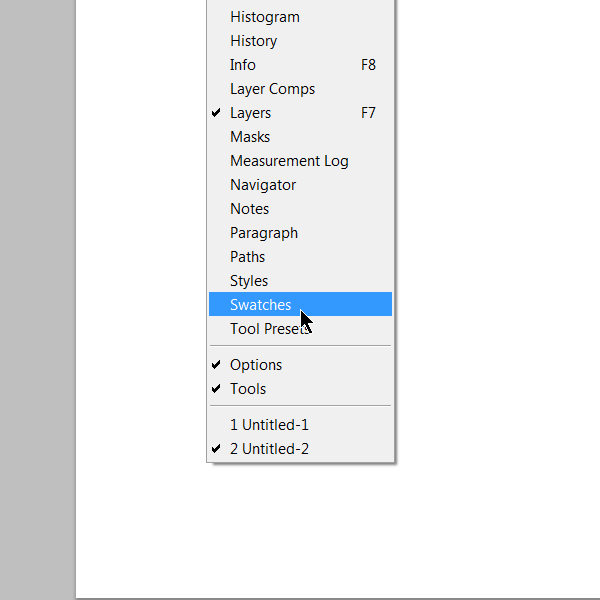
Step 5
To access the swatch you just saved, find your swatches panel. I explained how to open your swatches panel in Step 1, but if you forgot, just go to Window > Swatches to open the swatches panel.
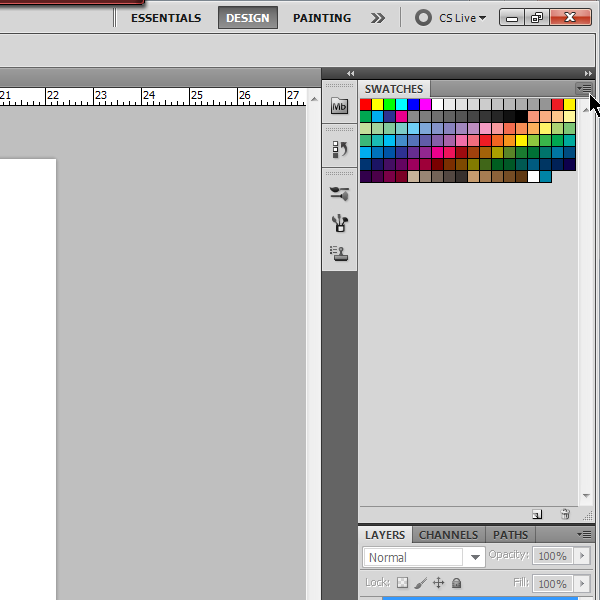
If you already have the swatches panel open, you may find it somewhere in the area below.
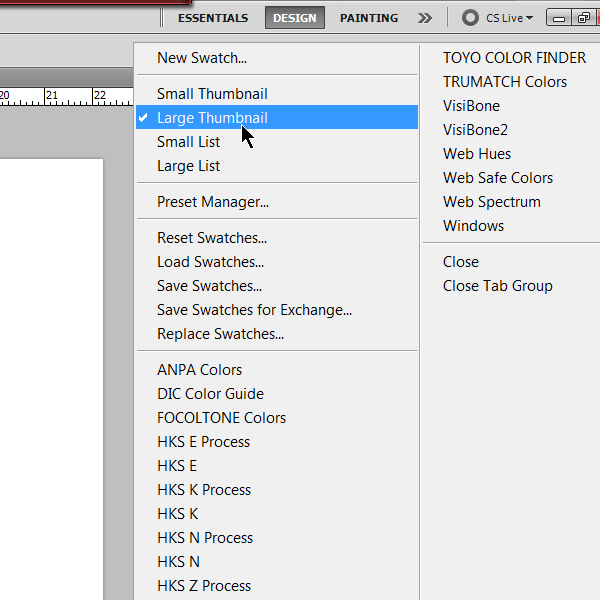
Step 6
Now, to find the swatch you just saved, look in the swatches panel we just opened. To change the size of the thumbnails, click the little drop down icon, and choose “Large Thumbnail”.
Rollover the thumbnails and a color picker tools should appear. If you hover over a certain thumbnail for a couple seconds, it will show the name of the swatch. Hover over the one that looks as close to the one you saved, then make sure the name is the same as you saved it. Then just left click the thumbnail and the color will be set as your foreground color.
Next, I want to show you how to save a number of swatches together.
Step 7
Once you have multiple colors chosen and saved into your swatches using the method I showed you above, they should all be in the same “Swatches” window panel.
To save the colors in the same swatch set, click the little drop down icon in the top right-hand corner of the swatches panel, then find the “Save Swatches” option.
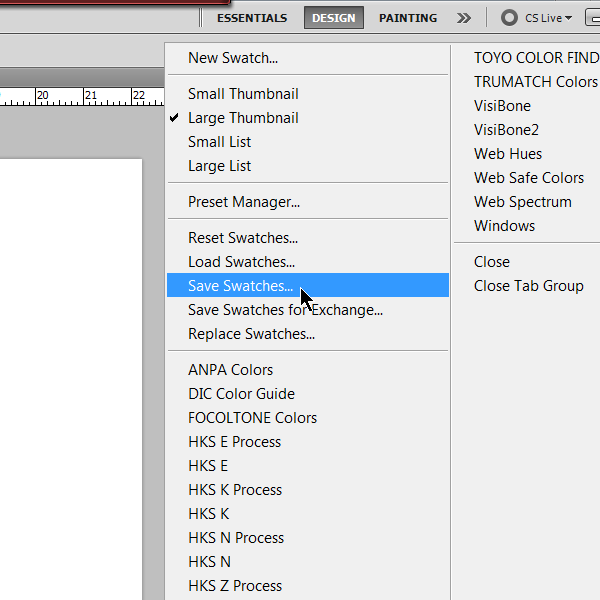
Step 8
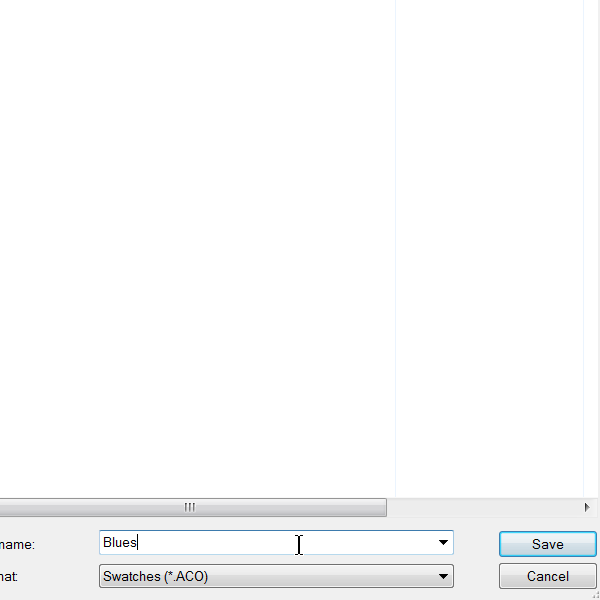
The following window should appear after you click “Save Swatches”. Just give it a name such as “Blues” and click save. Photoshop should automatically select your “Color Swatches” directory, their should be no need to change the save destination.
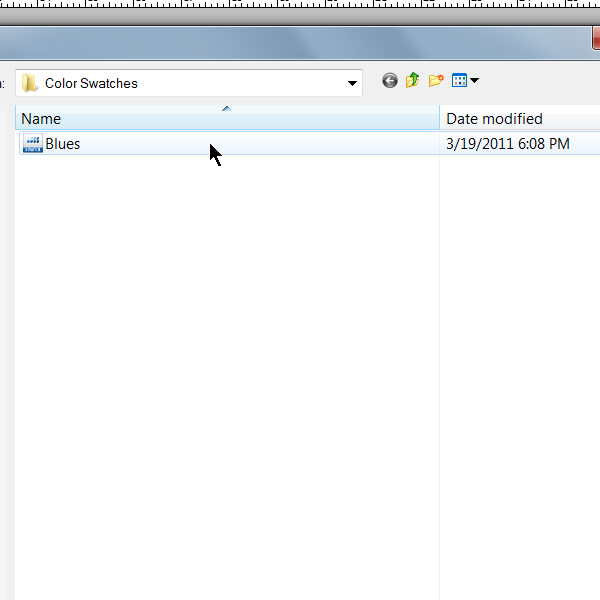
So now, How do you load the swatches into your window after you just saved them? Let’s go back to the “Swatches” panel, and click the little drop down icon again. There should be an option titled “Load Swatches”. Click this, and then choose the file you just saved. In my case, it will be “Blues.aco”
Conclusion
In closing, swatches can be very useful in the everyday workflow. Using color swatches can greatly reduce the time it takes for you to find and/or remember the perfect colors for your project.


Nenhum comentário:
Postar um comentário